
Choosing Family‑Friendly Shallow Cenotes in the Yucatán Peninsula
When planning a cenote outing with children, the primary safety considerations are water depth, accessibility, and on‑site amenities. The Yucatán Peninsula offers a dense network of limestone sinkholes, yet only a subset meet the criteria for a low‑risk, family‑oriented experience. The following factors should guide the selection process, followed by a concise list of cenotes that consistently satisfy those standards.
—
Key Selection Criteria
1. Maximum Depth ≤ 3 m (≈10 ft)
- Shallow basins reduce the risk of accidental submersion and allow children to stand comfortably. Depth charts are often posted at the entrance; if not, local guides can confirm measurements before entry.
2. Flat, Non‑Slippery Bottom
- A level limestone floor or sand‑covered base provides stable footing.
3. Safety Infrastructure
- Ladders or Ramps: Fixed stainless‑steel ladders or gently sloping ramps enable easy entry and exit for toddlers and stroller users.
- Railings/Handrails: Metal or wooden railings along the perimeter help supervise children near the water’s edge.
- Lifeguard Presence: Seasonal lifeguard staffing is a strong indicator of family suitability.
4. Sanitary Facilities
- Clean restrooms, diaper‑changing stations, and potable‑water fountains reduce health hazards. Facilities should be clearly signposted and maintained daily.
5. Shade and Seating
- Natural canopy (e.g., surrounding mahogany trees) or constructed shade structures protect children from direct sun exposure. Picnic tables or benches allow parents to supervise comfortably while children play.
6. Accessibility for Strollers and Wheelchairs
- Paved or compacted‑soil paths from parking areas to the cenote entrance minimize tripping hazards. Ramps with a gradient ≤ 1:12 meet universal‑design standards.
7. Parking and Security
- Designated, fenced parking lots with lighting deter theft and provide a safe staging area for families. Some cenotes also offer on‑site lockers for personal belongings.
8. Reputation and Reviews
- Cross‑reference recent traveler feedback on reputable platforms (e.g., TripAdvisor, Google Reviews). Look for comments emphasizing “family‑friendly,” “shallow,” and “well‑maintained” as recurring themes.
—
Recommended Shallow Cenotes for Children
| Cenote | Location | Approx. Max Depth | Safety Features | Amenities | ||
|---|---|---|---|---|---|---|
| Cenote X’keken (Dzitnup) | Near Valladolid | 2.5 m | Ladder, railings, lifeguard (seasonal) | Restrooms, changing area, shaded patio | ||
| Cenote Samula | Adjacent to X’keken | 2.8 m | Fixed ladder, handrails, flat limestone floor | Restrooms, small café, covered seating | ||
| Cenote Azul | Near Playa del Carmen | 2.0 m (central pool) | Rope‑handed ladders, gentle slope, lifeguard during high season | Restrooms, snack bar, ample shade from surrounding trees | ||
| Cenote Cristalino | Near Tulum | 2.5 m | Concrete steps, railings, non‑slippery floor | Restrooms, picnic tables, shaded pavilion | ||
| Cenote Dos Ojos – “The Lab” Section | Near Tulum | 2.5 m (restricted shallow zone) | Ladder, handrails, lifeguard (daytime) | Restrooms, changing rooms, shaded deck | ||
| Cenote Xcanche | Near Playa del Carmen | 2.2 m | Wide concrete ramp, railings, flat sandy bottom | Restrooms, restaurant, shaded pergola | ||
| Cenote San Lorenzo Oxman | Near Valladolid | 2.0 m | Rope ladder, low‑profile railings, gentle entry | Restrooms, small kiosk, canopy of mahogany | ||
| Cenote Dzonbacal | Near Puerto Morelos | 2.5 m | Fixed ladder, handrails, flat limestone | Restrooms, shaded seating, parking lot | ||
| Cenote Yaxbacaltun | Near Cobá | 2.3 m | Concrete steps, railings, lifeguard (weekends) | Restrooms, changing area, shaded benches | ||
| Cenote San Miguelito | Near Playa del Carmen | 2.0 m | Wide ramp, railings, flat bottom | Restrooms, snack kiosk, shaded patio |
*All listed cenotes maintain daily cleaning schedules, enforce a “no running” policy near the water’s edge, and provide life‑vest rental for children under 12 kg.*
—
Practical Tips for Confirmation
- Call Ahead: Contact the cenote’s administrative office 24 hours before arrival to verify lifeguard schedules and any temporary closures due to maintenance or weather.
- Inspect On Arrival: Check that ladders are securely anchored, railings are intact, and the water surface is free of debris.
- Observe Water Quality: Clear, still water with a slight blue‑green hue indicates low bacterial load; avoid cenotes with visible algae blooms or murky conditions.
- Plan Timing: Early morning visits (8 a.m.–10 a.m.) often have fewer crowds, allowing easier supervision of children and better access to amenities.
By applying these objective criteria and prioritizing cenotes that meet established safety standards, families can enjoy the unique experience of swimming in the Yucatán’s crystal‑clear sinkholes while minimizing risk for children.
Essential Gear Checklist for Kids’ Cenote Adventures
1. Swim‑Specific Footwear
- *Why*: Rocky or slippery cenote floors can cause cuts or bruises.
- *What to choose*: Closed‑toe water shoes with a non‑slip sole and a quick‑dry upper. Reinforced toe caps protect against accidental impacts, while the flexible sole allows children to feel the ground for better balance.
2. Floatation Devices Rated for Age and Weight
- *Why*: Even in shallow water, a sudden slip or loss of footing can submerge a child.
- *What to choose*: U.S. Coast Guard‑approved swim vests or inflatable float belts that fit snugly around the torso. Adjustable straps ensure a secure fit as the child moves. For toddlers, a “water noodle” or a soft foam float with a built‑in harness can provide extra stability.
3. UV‑Protective Swimwear
- *Why*: Cenotes are often open to bright sunlight; prolonged exposure can lead to sunburn, especially on sensitive skin.
- *What to choose*: Rash‑guard style shirts and board shorts made from UPF 50+ fabric. Long‑sleeve options are useful for younger children who may be more prone to sun irritation. Ensure the material is chlorine‑resistant and quick‑dry to prevent chafing.
4. Water‑Resistant Sun Protection
- *Broad‑Spectrum SPF 30+ Sunscreen*: Apply at least 15 minutes before entering the water and reapply every two hours, or after towel‑drying. Choose a reef‑safe, mineral‑based formula to avoid contaminating the cenote ecosystem.
- *Wide‑Brimmed Hat or UV‑Protective Cap*: A hat that stays secure when wet shields the face, ears, and neck. Look for a quick‑dry, breathable material with a chin strap.
5. Kid‑Sized Life Jackets for Deeper Sections
- *Why*: Some cenotes have sudden drop‑offs or hidden ledges even in areas marketed as “shallow.”
- *What to choose*: Inflatable or foam vests that meet ASTM F1169 standards. The vest should be snug around the shoulders and hips, with a secure buckle system that a child cannot easily release.
6. Water‑Proof First‑Aid Kit
- *Essential items*: Sterile gauze pads, adhesive bandages (various sizes), antiseptic wipes, waterproof adhesive tape, and a small tube of antibiotic ointment. Include a pair of waterproof tweezers for removing splinters. Pack the kit in a sealed zip‑lock bag to keep it dry.
7. Reusable Water‑Resistant Dry Bag
- *Why*: Keeps personal items—phones, wallets, extra clothing—dry while allowing easy transport.
- *What to choose*: A zip‑top bag rated for at least 30 minutes of submersion, with a sturdy handle or shoulder strap for hands‑free carrying.
8. Snorkel Set Adapted for Children
- *Why*: Some cenotes have crystal‑clear shallow zones where children enjoy observing underwater life.
- *What to choose*: A child‑size mask with a soft silicone seal, a short snorkel with a splash guard, and a small, buoyant floatation tube for added confidence.
9. Hydration Pack or Leak‑Proof Water Bottle
- *Why*: Warm weather and physical activity increase the risk of dehydration.
- *What to choose*: BPA‑free, insulated bottles that stay cool for several hours, or a small hydration bladder with a bite valve that can be sealed when not in use.
10. Portable Waterproof Communication Device
- *Why*: In case of an emergency, a waterproof two‑way radio or a sealed cell‑phone case ensures you can call for help without risking water damage.
- *What to choose*: Devices rated IPX8 (submersible beyond 1 meter) with a long battery life.
11. Eco‑Friendly Insect Repellent
- *Why*: Some cenotes are surrounded by vegetation where mosquitoes may be present, especially at dusk.
- *What to choose*: DEET‑free, Picaridin‑based repellents formulated for children, applied to exposed skin and clothing but avoided near the eyes and mouth.
12. Lightweight Quick‑Dry Towel
- *Why*: After exiting the water, a dry towel prevents chill and helps keep the child comfortable.
- *What to choose*: Microfiber towels that fold into a small pouch and dry within minutes.
13. Identification Tags
- *Why*: In crowded cenote sites, a child can become separated from guardians.
- *What to choose*: Waterproof wrist or ankle bands engraved with the child’s name, emergency contact number, and any relevant medical information (e.g., allergies).
14. Backup Clothing Set
- *Why*: Accidental spills or a sudden rain shower can leave a child wet and cold.
- *What to choose*: A dry‑fit shirt, lightweight long‑leg shorts, and a pair of socks, all stored in the dry bag.
By assembling this checklist before each visit, families can focus on the wonder of Mexico’s shallow cenotes while minimizing risks. The gear emphasizes safety, comfort, and environmental stewardship, ensuring that children experience the crystal‑clear waters with confidence and protection.
Safety Briefing: How to Conduct a Pre‑Dive Inspection with Children
A thorough pre‑dive inspection is the cornerstone of a safe cenote experience for families. When children are involved, the inspection must be systematic, visual, and interactive, allowing young swimmers to understand the environment while adults verify every safety parameter. Follow these step‑by‑step procedures before entering any shallow cenote.
1. Gather the Group and Review the Plan
Assemble all participants at the cenote entrance. Explain the dive plan in simple language: where the entry point is, the depth limits for children, the location of exit routes, and the signals that will be used. Encourage children to repeat the plan back to confirm comprehension.
2. Check Personal Gear
- Swimwear and Footwear: Verify that each child is wearing a secure, non‑slipping water shoe or sandal to protect feet on limestone surfaces.
- Life Jackets or Float Vests: If any child is not a confident swimmer, fit a properly sized, Coast Guard‑approved vest. Perform a “float test” by having the child sit in shallow water while the vest is on; the child should remain upright without effort.
- Masks, Snorkels, and Fins: Ensure masks seal without leaking, snorkels are clear of obstructions, and fins are the correct length. Have children practice a quick mask‑clear and snorkel‑breath hold while standing in waist‑deep water.
3. Inspect the Water Entry Area
- Surface Condition: Look for algae, oil slicks, or debris that could cause slipping. Clear any loose stones or plant matter with a hand‑held net or by gently sweeping with a foot.
- Depth Markers: Confirm that the cenote’s posted depth markers are visible. If markers are faded, use a measuring stick to verify the water depth at the intended entry point; children should never exceed a depth of 1.2 m (4 ft) unless accompanied by a certified adult diver.
- Current and Flow: Although most shallow cenotes are still, occasional inflow from underground streams can create subtle currents. Place a floating object (e.g., a brightly colored beach ball) near the entry zone; observe its movement for at least 30 seconds. If the object drifts noticeably, select an alternative entry point.
4. Examine the Bottom and Surrounding Walls
- Surface Integrity: Walk along the shallow perimeter, feeling for sharp edges, broken limestone, or loose rocks. Any protruding fragments should be reported to the cenote staff for removal.
- Visibility: Test water clarity by submerging a hand and noting how far vision extends. In water with visibility under 2 m (6 ft), keep children within arm’s reach at all times.
5. Identify Exit Routes and Safety Equipment
- Primary Exit: Point out the nearest ladder, rope, or natural slope that leads back to dry ground. Demonstrate the climb or descent while children watch.
- Secondary Exit: Locate an alternate egress in case the primary route becomes obstructed.
- Emergency Gear: Locate the nearest life‑ring, rescue board, and first‑aid kit. Ensure the adult supervising the children knows the exact placement of each item.
6. Conduct a Quick Buddy Check
Pair each child with an adult or older sibling. Verify that each buddy’s gear is secure, that they understand the hand‑signal system (e.g., “thumbs up” for OK, “hand raised” for stop), and that they can reach each other within a 2‑meter radius.
7. Final Clearance and Entry
Once all items are verified, give a concise verbal clearance: “All set, we are ready to enter.” Have each child step into the water one at a time, maintaining visual contact until they are fully settled.
“Children’s confidence in cenote swimming grows dramatically when they actively participate in the safety walk‑through. A brief, hands‑on inspection—letting them touch the limestone, test the water’s temperature, and practice the exit ladder—creates muscle memory that translates into faster, calmer responses if an unexpected situation arises.”
Guidelines for Proper Swimwear and Footwear in Shallow Cenotes
When exploring shallow cenotes with children, the choice of swimwear and footwear directly influences comfort, safety, and the overall experience. The following guidelines address material selection, fit, sun protection, and practical considerations unique to the limestone‑lined, often slippery environments of Mexican cenotes.
1. Swimwear Material and Design
- Quick‑dry, chlorine‑resistant fabrics such as polyester‑spandex blends are ideal. These fabrics shed water rapidly, reducing the weight children must carry while swimming and minimizing the risk of chafing on rocky edges.
- Avoid cotton; it retains moisture, becomes heavy, and can become a breeding ground for bacteria in warm water.
- Full‑coverage options (rash‑guard shirts, board shorts, or one‑piece swimsuits with leg coverage) provide an extra barrier against sunburn and abrasions from limestone surfaces. For families preferring modest attire, loose‑fitting, UPF‑rated shirts paired with swim trunks meet local cultural expectations while maintaining mobility.
- Secure seams and reinforced stitching are essential. Loose seams can catch on submerged rocks or vegetation, potentially tearing the garment and exposing skin.
2. Fit and Sizing
- Snug but not restrictive: Swimwear should hug the body without compressing circulation. A snug fit prevents the garment from shifting, which can expose skin to sharp edges.
- Adjustable features: Look for swimwear with adjustable waistbands or drawstrings, allowing quick size changes as children grow or after a wet‑and‑dry transition.
- Test for mobility: Children should be able to kick, squat, and reach forward without the fabric binding. Conduct a brief movement test on land before entering the water.
3. Sun Protection
- UPF rating: Choose swimwear with an Ultraviolet Protection Factor (UPF) of 30 or higher. In open cenotes, sunlight can reflect off the water, intensifying exposure.
- Complementary gear: Pair swimwear with wide‑brimmed hats, UV‑blocking sunglasses, and reef‑safe sunscreen (minimum SPF 30). Reapply sunscreen every two hours, especially after exiting the water.
4. Footwear Requirements
- Closed‑toe water shoes: Soft‑sole aqua shoes with a snug fit protect against sharp limestone, submerged debris, and sudden temperature changes. Look for shoes with a flexible, non‑slip outsole that conforms to the foot while providing grip on wet stone.
- Secure fastenings: Velcro straps or adjustable laces prevent shoes from slipping off in the water, which could lead to loss or injury.
- Avoid flip‑flops and sandals: Open‑toe designs offer little protection from cuts, scrapes, or stepping on hidden objects. Their thin soles also provide insufficient traction on slick cenote floors, increasing the likelihood of slips.
5. Footwear Material Considerations
- Neoprene or mesh uppers: These materials dry quickly and reduce the risk of fungal growth.
- Non‑abrasive soles: A rubber sole with a patterned tread offers the best balance between grip and gentle contact with limestone, minimizing erosion of the cenote’s natural surfaces.
6. Practical Packing Tips
- Carry a spare set of swimwear and water shoes in a waterproof dry bag. Children often emerge from a cenote damp, and a dry change prevents prolonged exposure to cold air, reducing the risk of hypothermia in high‑altitude regions.
- Label each item with the child’s name to avoid mix‑ups, especially in group tours where multiple children may have similar gear.
- Separate dirty garments from clean ones using zip‑lock bags to keep the rest of the luggage dry and odor‑free.
7. Cultural and Environmental Sensitivity
- Modesty norms vary by region; in cenotes located near traditional Mayan communities, families are encouraged to wear swimwear that covers the torso and thighs.
- Leave no trace: Choose footwear that does not leave marks on the cenote floor and avoid any gear with metal buckles that could damage delicate limestone formations.
By adhering to these swimwear and footwear guidelines, families can ensure that children remain comfortable, protected from sun and sharp surfaces, and fully able to enjoy the unique, crystal‑clear waters of Mexico’s shallow cenotes. Proper preparation also supports the preservation of these natural wonders for future visitors.
Step‑by‑Step Supervision Techniques for Young Swimmers
1. Pre‑Entry Briefing
- Gather the children at the cenote entrance and explain the specific rules for that site (depth limits, designated swimming zones, no running, no diving).
- Demonstrate the hand‑signal system you will use: a raised palm for “stop,” a closed fist for “stay close,” and a wave for “all clear.”
- Assign each child a simple, memorable nickname for quick verbal identification if the group becomes dispersed.
2. Establish a Supervision Ratio
- For children ages 4‑7, maintain a 1:1 adult‑to‑child ratio; for ages 8‑12, a 1:2 ratio is acceptable if the children have basic water confidence.
- Position the supervising adult(s) within arm’s reach of the youngest swimmer at all times, preferably standing on a stable, non‑slippery surface such as a natural rock ledge or a portable pool step.
3. Create a Visual Boundary
- Use floating buoys, brightly colored pool noodles, or a rope line to mark a safe swimming perimeter that matches the cenote’s shallow zone (typically 3‑4 feet deep).
- Explain that crossing the line requires a verbal request and a “stop” signal from the adult before proceeding.
4. Implement the “Buddy System”
- Pair children of similar swimming ability together, ensuring each pair is within sight of an adult.
- Instruct buddies to keep their arms linked or hold a small floating device while moving, reinforcing mutual responsibility.
5. Continuous Head‑Count Checks
- Conduct a head‑count before entering the water, after any pause (e.g., when retrieving a dropped item), and before exiting the cenote.
- Use a simple chant (“One, two, three…”) to make the count audible over ambient water sounds.
6. Active Monitoring Technique
- Adopt a “scan and focus” method: sweep the entire swimming area every 30 seconds, then focus on one child for an additional 10‑15 seconds before moving to the next.
- Keep your eyes level with the water surface; avoid looking down at your phone or reading a map while children are in the water.
7. Hands‑On Safety Position
- For the youngest swimmers, stand directly behind them with one hand on the child’s back and the other ready to support the child’s head if needed.
- For older children, maintain a “ready‑hand” stance: one hand on a stable surface, the other extended toward the child, prepared to intervene instantly.
8. Emergency Response Drill
- Before allowing free swim time, practice a brief “stop‑and‑grab” drill: shout “stop,” have the child freeze, then demonstrate how you would reach out and lift them safely onto the shore or a step.
- Reinforce that the drill is a routine safety mea not a punishment.
9. Hydration and Rest Intervals
- Schedule 5‑minute rest breaks every 20‑30 minutes of swimming. During these intervals, move the children to a shaded, dry area, perform a quick visual check for signs of fatigue, and re‑affirm the safety boundaries.
- Use the break to re‑apply sunscreen and re‑hydrate, reducing the risk of heat‑related accidents.
10. Post‑Swim Debrief
- Once the group exits the water, gather the children for a short discussion. Ask each child to name one safety rule they followed and one thing they found challenging.
- Provide positive reinforcement for correct behavior and address any observed lapses immediately, setting the stage for improved supervision on subsequent visits.
By following this structured, step‑by‑step approach, adults can maintain vigilant oversight while allowing children to enjoy the unique, crystal‑clear environment of Mexico’s shallow cenotes. Consistent application of these techniques reduces the likelihood of accidents, builds children’s confidence in the water, and creates a safe, memorable experience for the whole family.
Managing Sun Exposure and Hydration While Exploring Cenotes
Cenotes are natural sinkholes formed in limestone, often surrounded by open‑air platforms that receive intense tropical sunlight. When visiting shallow cenotes with children, proactive sun‑protection and fluid‑replacement strategies are essential to prevent heat‑related illness and maintain comfort throughout the swim.
1. Schedule Visits for Cooler Hours
The sun’s peak ultraviolet (UV) intensity in the Yucatán Peninsula occurs between 11 a.m. and 3 p.m. Plan entry to shallow cenotes early in the morning (7 a.m.–10 a.m.) or late in the afternoon (4 p.m.–6 p.m.). During these windows ambient temperatures are typically 2 °C–4 °C lower, and the reflected glare off the water surface is reduced, decreasing the risk of sunburn and heat stress for children.
2. Choose Appropriate Sun‑Protective Clothing
- UPF‑Rated Swimwear: Opt for swimsuits labeled with an Ultraviolet Protection Factor (UPF) of 30 or higher. UPF 30 blocks 97 % of UV‑B radiation; UPF 50 blocks 98 %.
- Rash Guards and Light‑Weight Cover‑Ups: Long‑sleeve rash guards made of polyester or nylon provide additional protection without restricting movement. For shore‑side waiting periods, a loose, breathable, long‑sleeve shirt and wide‑leg trousers made of tightly woven cotton or linen can be worn.
- Head Protection: Wide‑brimmed hats (minimum 7 cm brim) shield the face, neck, and ears. Children’s hats should be secured with chin straps to prevent loss in water.
- Footwear: Water‑friendly sandals with closed toes guard against hot sand or rock surfaces and reduce the chance of cuts.
3. Apply Broad‑Spectrum Sunscreen Correctly
- Selection: Use a broad‑spectrum sunscreen with SPF 30–50 that protects against both UV‑A and UV‑B rays. Mineral (zinc oxide or titanium dioxide) formulations are less likely to irritate sensitive skin.
- Quantity: Apply at least 2 mg of sunscreen per cm² of skin, roughly a nickel‑sized dollop for the face and a shot‑glass amount for the entire body.
- Timing: Apply sunscreen 15–30 minutes before exposure to allow full absorption. Reapply every 80 minutes for water‑resistant formulas, and immediately after towel‑drying, swimming, or heavy sweating.
- Special Considerations for Children: Test a small area for allergic reaction 24 hours before the trip. Avoid applying sunscreen to the eyes; use a child‑safe, fragrance‑free product.
4. Hydration Protocol
- Baseline Fluid Intake: Children should consume 150 ml of water per kilogram of body weight in the 24 hours preceding the excursion. For a 20‑kg child, this equals 3 L of fluid.
- During the Visit: Offer 120–180 ml of water every 20 minutes of active exposure. Use insulated, BPA‑free bottles to keep water cool without ice that could cause sudden temperature changes.
- Electrolyte Replacement: For stays exceeding 90 minutes or when children are sweating heavily, supplement water with an oral rehydration solution containing 6 g of glucose and 2.5 g of sodium per liter. This ratio promotes optimal intestinal absorption.
- Monitoring: Observe urine color (light straw indicates adequate hydration) and watch for signs of dehydration: dry lips, decreased tear production, lethargy, or rapid heart rate. Promptly administer 250 ml of water for mild symptoms; seek medical assistance if symptoms progress.
5. Shade and Rest Intervals
Even in shallow cenotes, the reflective surface intensifies UV exposure. Establish a shaded rest area on the cenote’s perimeter using natural foliage, a portable pop‑up canopy, or a beach‑umbrella. Rotate children between swimming and shade every 30–45 minutes to limit continuous sun exposure. During rest periods, encourage fluid intake and apply a fresh layer of sunscreen.
6. Emergency Preparedness
Carry a compact first‑aid kit containing:
- Sterile gauze and adhesive bandages for minor cuts.
- A small bottle of aloe‑vera gel for sunburn relief.
- Oral rehydration packets.
- A whistle or signal device for summoning assistance if a child becomes disoriented in the water.
7. Education and Modeling
Teach children the importance of sun safety before entering the cenote. Demonstrate proper sunscreen application, encourage them to drink water regularly, and involve them in checking the shade area. Modeling responsible behavior reinforces habits that reduce risk.
By integrating timed visits, UPF clothing, disciplined sunscreen use, systematic hydration, and regular shade breaks, families can enjoy the crystal‑clear waters of Mexico’s shallow cenotes while safeguarding children against sun‑related hazards and dehydration.
First‑Aid Essentials: Treating Minor Cuts and Scrapes in Remote Locations
When exploring shallow cenotes with children, even a brief slip can produce a cut or scrape. In remote sections of the Yucatán Peninsula, professional medical help may be several minutes to an hour away, making immediate self‑care critical. The following protocol outlines the supplies to carry, step‑by‑step treatment, and post‑care measures to prevent infection and ensure a swift return to the water.
—
1. Core Kit Components
| Item | Quantity | Reason | ||
|---|---|---|---|---|
| Sterile gauze pads (4 × 4 in) | 5–7 | Primary wound coverage | ||
| Adhesive bandage strips (various sizes) | 10–15 | Securing small lacerations | ||
| Non‑adhesive foam dressing | 2 | Cushioning deeper scrapes | ||
| Antiseptic wipes (alcohol‑free) | 5–8 | Gentle cleaning without stinging | ||
| Antiseptic solution (e.g., povidone‑iodine 10 %) | 30 ml | Broad‑spectrum disinfection | ||
| Triple‑antibiotic ointment (bacitracin, neomycin, polymyxin B) | 1 × 15 ml tube | Reducing bacterial colonisation | ||
| Elastic self‑adhesive bandage (2‑in width) | 1–2 rolls | Securing larger dressings | ||
| Disposable gloves (nitrile) | 2 pairs | Preventing cross‑contamination | ||
| Small scissors (rounded tip) | 1 | Cutting tape or gauze | ||
| Tweezers (stainless steel) | 1 | Removing debris | ||
| Waterproof adhesive tape | 1 roll | Reinforcing dressings | ||
| Emergency blanket (mylar) | 1 | Maintaining body temperature if evacuation is delayed | ||
| Waterproof container or zip‑lock bag | 1 | Protecting supplies from humidity |
All items should be stored in a sealed, waterproof pouch inside a daypack that remains easily accessible while near the water’s edge.
—
2. Immediate Response
1. Assess the wound – Determine depth, length, and presence of foreign material. Minor superficial cuts (≤ 0.5 cm) and scrapes without deep tissue exposure qualify for on‑site care.
2. Don gloves – Reduces infection risk for both caregiver and child.
3. Stop bleeding – Apply gentle pressure with a clean gauze pad for 1–2 minutes. Persistent bleeding beyond this timeframe may indicate a more serious injury requiring professional attention.
4. Rinse – Use clean, lukewarm water from a refillable bottle or a pre‑filled sterile saline bag to flush away sand, algae, and debris. Avoid high‑pressure streams that could embed particles deeper.
—
3. Disinfection
1. Pat the wound dry with a sterile gauze pad.
2. Apply a single wipe of an alcohol‑free antiseptic wipe, moving from the center outward to prevent contaminating surrounding skin.
3. For larger surfaces, gently dab a small amount of povidone‑iodine solution; allow it to air‑dry for 30 seconds.
—
4. Dressing
1. Apply ointment – Spread a thin layer of triple‑antibiotic ointment over the entire wound area.
2. Cover – Place a sterile gauze pad directly on the ointment. For very small cuts, an adhesive strip may suffice.
3. Secure – Use an elastic self‑adhesive bandage or waterproof tape to hold the gauze in place without restricting circulation. Check that two fingers can slide under the bandage.
—
5. Monitoring and Follow‑Up
- First 24 hours – Re‑examine the wound every 4–6 hours. Replace the dressing if it becomes wet, dirty, or loosened.
- Signs of infection – Increasing redness, swelling, warmth, pus, or fever warrant immediate evacuation to the nearest clinic or hospital.
- Hydration and rest – Encourage the child to drink water and avoid re‑entering the cenote until the wound is fully covered and the child feels comfortable.
—
6. Special Considerations for Cenote Environments
- Water quality – Cenote water can be mineral‑rich and slightly acidic, which may irritate open wounds. Prompt dressing reduces exposure.
- Sun exposure – UV radiation can delay healing. Keep the dressed area shaded when possible and re‑apply sunscreen only on intact skin.
- Temperature fluctuations – In early morning or late afternoon, water temperature can drop sharply. An insulated dressing (e.g., a thin layer of gauze beneath a waterproof bandage) helps maintain a stable wound environment.
—
7. Post‑Adventure Care
After leaving the cenote, clean all reusable supplies with mild soap and hot water, then air‑dry before repacking. Replace any single‑use items (gloves, wipes, gauze) that have been opened. Document the incident in a travel log for future reference and to inform any subsequent medical consultation.
By carrying a compact, waterproof first‑aid kit and following the outlined protocol, caregivers can effectively manage minor cuts and scrapes, minimizing infection risk and preserving the enjoyment of cenote exploration for the whole family.
Understanding Water Depth Markers and Safe Entry Points for Kids
Mexico’s cenotes are natural sinkholes that vary dramatically in depth, even within a single pool. Accurate interpretation of depth markers and identification of child‑friendly entry points are essential for preventing accidents and ensuring an enjoyable experience for families.
Depth markers in cenotes are typically painted on the limestone walls, installed as metal or plastic plates, or displayed on floating boards. The most common system uses color coding: green indicates water no deeper than 0.5 m (1.6 ft), blue signals depths of 0.5–1.0 m (1.6–3.3 ft), and red warns of water deeper than 1.0 m (3.3 ft). Some sites supplement colors with numeric labels in meters or feet. When markers are absent, a simple “hand‑test” can be performed by submerging a hand to gauge depth before allowing a child to step in.
In addition to color cues, many cenotes place tactile markers at the water’s edge. Low‑profile metal strips or textured tiles create a physical boundary that alerts children when they approach deeper water. These strips are often positioned at the transition from the shallow “play zone” to the deeper swimming area. Parents should verify that the tactile line aligns with the painted depth indicator, as erosion can shift markings over time.
Safe entry points are deliberately designed to accommodate families. The most reliable locations feature solid stone steps, concrete ladders, or wooden platforms that extend from the shore into water no deeper than 0.5 m. Steps are usually spaced at 20–30 cm (8–12 in) intervals, providing a gradual incline that reduces the risk of slipping. Ladders are anchored to the limestone and have wide rungs spaced at 30 cm (12 in) to support small feet. Platforms are often constructed from non‑slippery material and include a low rail or handhold for added stability.
When evaluating an entry point, consider the following criteria:
1. Depth Consistency – The water depth should remain uniform across the entire step or ladder area. Sudden drop‑offs indicate an unsuitable entry zone for children.
2. Surface Traction – Verify that the stepping surface is textured or treated with a non‑slip coating. Wet limestone can become extremely slick, especially after rain.
3. Visibility – Clear water and adequate lighting allow caregivers to see a child’s feet and monitor movement. Turbid water obscures depth perception and should be avoided for young swimmers.
4. Barrier Presence – Some cenotes install low fences or rope barriers around deeper sections. These act as visual deterrents and help keep children within the shallow zone.
Before entering, conduct a quick safety walk‑around. Check for loose stones, algae‑covered surfaces, and any recent changes to the depth markers. If markers appear faded or missing, request clarification from on‑site staff or opt for an alternative entry point.
Supervision remains the most critical factor. Even in shallow zones, children can lose balance or become entangled in underwater vegetation. A caregiver should stay within arm’s reach, especially for children under five years of age. Positioning the caregiver on a stable step or platform ensures a firm footing while maintaining eye contact with the child.
Finally, equip children with appropriate flotation devices when the depth exceeds 0.3 m (1 ft). Vests that meet international safety standards provide buoyancy without restricting movement and are especially useful in cenotes where water temperature can cause rapid fatigue.
By systematically reading depth markers, selecting entry points with gradual, non‑slippery access, and maintaining constant supervision, families can safely explore Mexico’s shallow cenotes while preserving the natural wonder of these unique water formations.
Booking Certified Guides and Child‑Safety Certified Tours
When planning a cenote visit with children, selecting a guide or tour operator that holds recognized certifications is a critical layer of protection. Certified professionals are required to complete formal training in water safety, first‑aid, and local environmental regulations. This training translates into consistent, documented procedures that reduce the likelihood of accidents and ensure that children receive age‑appropriate supervision throughout the experience.
Key Certifications to Verify
1. Mexican National Tourist Certification (CENOTUR) – This government‑issued credential confirms that the guide has completed the national curriculum for cenote navigation, including depth‑assessment techniques, rescue protocols, and knowledge of the geological characteristics unique to each site. Guides with CENOTUR are also mandated to carry a current first‑aid certificate.
2. International Lifesaving Federation (ILF) or equivalent – An ILF‑approved lifeguard certification demonstrates proficiency in water rescue, CPR, and the use of rescue equipment such as flotation devices and pole‑rescue kits. For tours involving children, an ILF Level 2 or higher is preferred, as it includes specific training on pediatric rescue scenarios.
3. Child‑Safety Certified Tour Operator (CSTO) – This industry‑wide standard, administered by several tourism safety associations, requires operators to develop and document child‑focused safety plans. The plan must cover pre‑tour briefings, child‑to‑adult ratios, mandatory use of personal flotation devices (PFDs) sized for each child, and a clear emergency communication protocol.
How to Confirm Authenticity
- Request a copy of the guide’s certification card or digital badge before booking. Authentic certificates display the issuing authority, expiration date, and a unique identification number.
- Cross‑reference the identification number on the issuing body’s online registry, if available. Many national tourism boards maintain searchable databases of licensed guides.
- Verify that the tour operator’s child‑safety certification is current; most certifications require renewal every two years and include a documented audit of safety procedures.
Safety Protocols Common to Certified Tours
- Pre‑tour briefing: Certified guides conduct a mandatory safety talk that outlines depth limits, prohibited activities (such as diving in shallow areas), and the proper use of PFDs. For children, the briefing includes simple, visual cues to reinforce understanding.
- PFD enforcement: Every child is required to wear a Coast Guard‑approved flotation device that fits snugly around the torso and shoulders. Certified tours keep an inventory of sizes ranging from infant to pre‑teen, ensuring a proper fit.
- Supervision ratio: Child‑safety certified tours maintain a minimum adult‑to‑child ratio of 1:4 for ages 4‑7 and 1:6 for ages 8‑12. This ratio is monitored continuously, with designated “child safety monitors” who are separate from the primary guide.
- Emergency equipment: Certified guides travel with a portable rescue kit that includes a life‑ring, a rescue pole, a waterproof first‑aid bag, and a two‑way radio linked to the nearest medical facility. The kit is inspected before each outing, and the guide documents the inspection in a logbook.
Cost Considerations
Tours led by certified guides typically command a premium of 15‑30 % over non‑certified alternatives. The additional expense reflects the guide’s specialized training, the higher quality of safety equipment, and the operational overhead of maintaining child‑safety certifications. Families can often reduce overall cost by booking multi‑day packages or group tours, which spread the certification fees across more participants while preserving the safety standards.
When to Choose Certified Services Over Self‑Guided Exploration
- Young children (under 12 years): The structured supervision and mandatory PFD usage of certified tours mitigate the higher risk associated with limited swimming ability and reduced situational awareness.
- Unfamiliar cenotes: Some shallow cenotes feature hidden currents, slippery limestone ledges, or sudden depth changes. Certified guides possess site‑specific knowledge that allows them to identify and avoid these hazards.
- Limited local language proficiency: Certified guides provide bilingual safety instructions, ensuring that children and non‑Spanish‑speaking parents receive clear, consistent messages.
Final Checklist for Parents
- Confirm the guide holds CENOTUR and an ILF‑level lifeguard certification.
- Verify the tour operator’s CSTO status and review their child‑safety plan.
- Ensure PFDs are available in appropriate sizes for every child.
- Ask about the adult‑to‑child supervision ratio and the presence of a dedicated child‑safety monitor.
- Review the emergency equipment list and confirm that a pre‑tour equipment inspection is documented.
By systematically selecting certified guides and child‑safety certified tours, families can enjoy the natural wonder of Mexico’s shallow cenotes with confidence that professional safety standards are being applied at every stage of the adventure.
Creating a Post‑Visit Checklist: Cleaning Gear and Monitoring Children’s Health
After a day of splashing in a shallow cenote, the work that keeps the experience safe for future outings begins at the exit gate. A systematic post‑visit routine protects children from lingering contaminants, prevents equipment degradation, and catches early signs of health issues that can arise from freshwater exposure.
—
1. Immediate Gear Rinse
1. Rinse All Items in Fresh Water – As soon as you leave the cenote, submerge swimsuits, rash guards, water shoes, and any reusable floatation devices in a clean water source. A gentle stream removes sediment, algae, and microscopic organisms that cling to fabric fibers.
2. Disassemble Equipment – Detach snorkel tubes, mask straps, and any detachable fins. Separate silicone components from plastic frames to allow thorough cleaning of each surface.
3. Use a Mild Antimicrobial Solution – Prepare a solution of 1 % diluted, fragrance‑free, non‑chlorine disinfectant (e.g., a diluted hydrogen peroxide or a commercial aquatic‑safe sanitizer). Soak non‑fabric parts for 2–3 minutes, then rinse again with fresh water. Avoid harsh chemicals that can damage neoprene or silicone.
—
2. Deep Cleaning and Drying
1. Wash Fabrics Separately – Place swimsuits, rash guards, and towels in a mesh laundry bag. Use a gentle, fragrance‑free detergent on a cold‑water cycle. Add a half‑cup of white vinegar to neutralize any residual chlorine or mineral deposits.
2. Sanitize Hard‑Surface Items – For snorkels, masks, and water shoes, scrub interior walls with a soft brush dipped in the antimicrobial solution. Pay special attention to the mask’s skirt and snorkel’s mouthpiece, where biofilm can form.
3. Air‑Dry Completely – Hang all items in a well‑ventilated area, away from direct sunlight, until every surface is dry to the touch. Moisture encourages mold and bacterial growth, especially in neoprene and silicone.
4. Inspect for Damage – While drying, examine seams, straps, and lenses for tears, cracks, or clouding. Replace compromised gear before the next outing to avoid water leakage or reduced protection.
—
3. Personal Hygiene for Children
1. Shower Thoroughly – Use lukewarm water and a mild, hypoallergenic soap to wash the entire body, focusing on the ears, nose, and any cuts or abrasions.
2. Ear Care – Tilt the head to each side and gently dry the outer ear canal with a soft towel. If water is trapped, use a hair dryer on the lowest heat setting held several inches away to evaporate moisture.
3. Nail and Skin Check – Trim fingernails and toenails to prevent scratches that could become infected. Look for redness, rash, or small puncture marks that may indicate contact with sharp rocks or aquatic insects.
—
4. Health Monitoring Over the Next 48 Hours
1. Hydration Log – Record fluid intake and urine output. Dehydration can be masked by the cool water environment; children should drink at least 1 – 1.5 L of water per hour of activity, plus additional fluids afterward.
2. Temperature and Symptoms – Take a temperature twice daily. Note any fever, vomiting, diarrhea, or unusual fatigue, which may signal gastrointestinal pathogens common in freshwater bodies.
3. Skin Reaction Diary – Document any delayed itching, swelling, or blistering. Freshwater algae and certain cyanobacteria can cause dermatitis that appears hours after exposure.
4. Ear and Respiratory Checks – Listen for signs of ear pain, muffled hearing, or persistent coughing. Water‑borne bacteria can lead to otitis externa or respiratory irritation, especially in children with pre‑existing allergies.
—
5. Documentation and Follow‑Up
1. Record the Checklist – Keep a printed or digital copy of the post‑visit checklist attached to your travel journal. Mark each completed step to ensure consistency across multiple cenote trips.
2. Consult a Healthcare Provider – If any symptom persists beyond 24 hours or worsens, seek medical advice promptly. Bring the checklist and notes on water expo as they help clinicians assess potential infections.
By adhering to this structured post‑visit checklist, families can maintain clean, functional gear, reduce the risk of water‑related illnesses, and ensure that each return to Mexico’s shallow cenotes remains a safe, enjoyable adventure for children.
Frequently Asked Questions
What age is appropriate for children to enter a shallow cenote in Mexico?
Children as young as 3 years old can safely enter shallow cenotes, provided they are supervised at all times, can swim or wear a life vest, and the water depth is no more than 1.2 meters (4 feet).
How should I choose a child‑friendly cenote?
Look for cenotes that are classified as “shallow” or “family‑friendly” on guidebooks or park signage, have clear water, gentle slopes, and safety railings. Verify that lifeguards are on duty and that the site provides life vests for children.
What safety equipment is essential for kids in a cenote?
A properly fitting U.S. Coast Guard‑approved life vest, water shoes with non‑slip soles, a whistle for each child, and a waterproof first‑aid kit. If the child cannot swim, a flotation belt or arm float is mandatory.
How can I prevent slips and falls on the cenote’s limestone floor?
Keep the floor dry by wiping feet before stepping onto wet surfaces, use water shoes with good traction, and avoid running. Encourage children to walk slowly and hold onto handrails where available.
Are there specific health risks for children in cenote water?
The water can be cool (18‑22 °C / 64‑72 °F) and may cause a sudden drop in body temperature. Ensure children are acclimated gradually, limit exposure to 10‑15 minutes, and monitor for signs of hypothermia or cramping.
What should I do if a child accidentally ingests cenote water?
Rinse the child’s mouth with clean water, encourage them to spit out any remaining water, and monitor for stomach upset. If vomiting, diarrhea, or fever develop, seek medical attention promptly.
How can I protect children from sun exposure while at a cenote?
Apply broad‑spectrum SPF 30+ sunscreen at least 15 minutes before arrival, reapply every two hours, provide wide‑brimmed hats, and use UV‑protective clothing. Seek shaded areas during peak sun hours (10 am–2 pm).
What emergency procedures should I know before entering a cenote with kids?
Locate the nearest lifeguard station, identify the emergency exit and first‑aid kit, and memorize the location of the nearest phone or radio. Have a clear plan for removing a child from the water quickly and signaling for help.
Is it safe to bring snacks or drinks into a cenote?
Yes, but keep all food and beverages sealed in waterproof containers to avoid attracting insects or contaminating the water. Do not bring glass containers, as they can break and create hazards.
How can I teach children basic water safety before visiting a cenote?
Conduct a brief swim lesson covering floating, treading water, and how to call for help. Practice using the life vest, demonstrate how to hold onto railings, and reinforce the rule “no running, no diving, stay within sight.”
| Cenote | Best Time to Visit | Entrance Fee (USD) | Parking Fee (USD) | Additional Costs |
|---|---|---|---|---|
| Cenote X’keken (Dzitnup) | December – April (dry season) | $7 adults / $4 children | $3 (per vehicle) | Optional guided tour $12 |
| Cenote Samula | November – May | $6 adults / $3 children | Free | Rental of life‑vests $5 per set |
| Cenote Azul | January – March (cool mornings) | $8 adults / $5 children | $2 (per vehicle) | Snack bar $3–$7 |
| Cenote Cenote Maya | February – April | $5 adults / $2 children | Free | Guided snorkeling $10 |
| Cenote X-Batun | December – May | $9 adults / $6 children | $4 (per vehicle) | Cave‑tour combo $15 |
Travelers Insight: Mastering the Family‑Friendly Cenote Experience
Exploring the Yucatán’s limestone labyrinth is one thing; doing so with little ones in tow is another. The region’s famed cenotes—natural wells carved over millennia—can feel like otherworldly swimming pools, yet their allure is matched by hidden hazards. The first step toward a stress‑free day is to align expectations with reality. Shallow, sun‑lit basins such as Cenote X’keken and Cenote Samula provide water no deeper than three metres, allowing children to stand, splash, and even practice basic strokes without the constant worry of a sudden drop‑off. When you arrive, take a moment to scan the entrance signage for depth charts; if numbers are missing, a quick chat with the on‑site attendant or a local guide usually yields an accurate reading.
Second, the composition of the floor matters as much as the water depth. Limestone can be slick when wet, but many family‑oriented cenotes have sand‑covered or gently sloping bottoms that offer firm footing. In contrast, cenotes with jagged limestone formations or coral‑like protrusions can turn a simple wade into a potential tumble. Encourage kids to wear water shoes—preferably with a non‑slip sole—to enhance traction, and always keep an eye on the perimeter where the water meets the stone. A good rule of thumb is the “one‑step rule”: if a child can comfortably place both feet on the bottom without stretching, the site is likely suitable for younger swimmers.
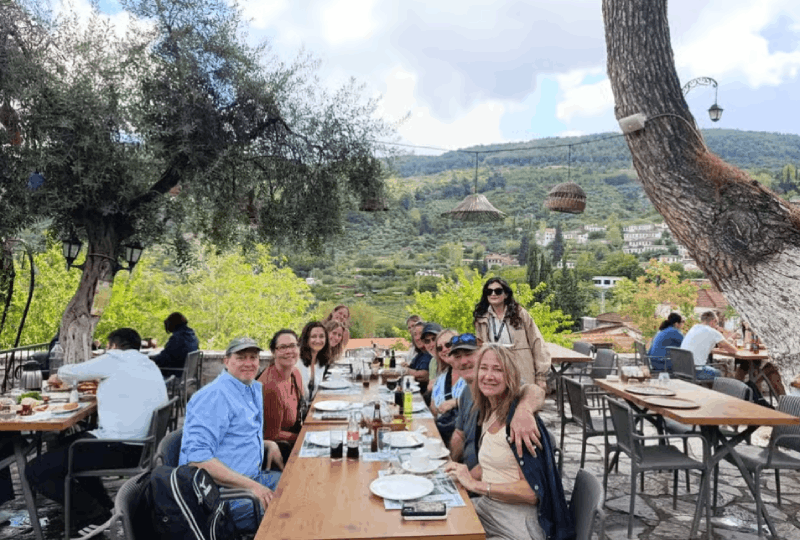
Third, consider the ancillary amenities that turn a basic swim into a family‑friendly outing. Restroom facilities, shaded changing areas, and readily available life‑vest rentals are indispensable, especially for toddlers who may not yet be confident swimmers. The cenotes listed in the table above have been vetted for these comforts; for instance, Cenote Azul offers a small snack bar where parents can grab a quick bite, while Cenote Samula provides complimentary parking, reducing logistical stress. If you plan to spend the entire morning, bring a reusable water bottle, sunscreen, and a lightweight towel—most cenotes lack vending machines and the tropical sun can be unforgiving.
Timing your visit is another strategic advantage. The dry season (December through April) delivers clear skies, lower humidity, and calmer water levels, making it the optimal window for families. Early mornings, just after sunrise, present the dual benefits of cooler temperatures and fewer crowds. This is especially valuable at popular spots like Cenote X‑Batun, where peak afternoon traffic can lead to long queues for entry and limited space on the platforms. Arriving before 9 a.m. not only secures a prime spot on the shoreline but also grants children the chance to explore the surrounding jungle pathways while the adults sip coffee at the nearby kiosks.
Lastly, embed a spirit of education into the adventure. The Yucatán’s cenotes are not merely swimming holes; they are geological archives that preserve Mayan history, endemic wildlife, and fragile ecosystems. Many sites offer interpretive panels describing the formation of these sinkholes and the cultural rituals once performed within them. Turn a splash session into a teachable moment by pointing out the stalactites that hang from the ceiling of Cenote X‑keken or the tiny fish that dart among the sun‑lit waters of Cenote Maya. Children who connect play with learning are more likely to respect the environment, ensuring that these natural treasures remain pristine for future generations.
In sum, a successful family cenote excursion hinges on three pillars: depth‑appropriate water, safe flooring, and supportive amenities. By consulting the curated table for cost and seasonal guidance, scouting the site’s safety features before entry, and planning around the dry‑season lull, parents can transform a potentially daunting outing into a memorable, low‑stress aquatic adventure. The Yucatán’s shallow cenotes stand ready to welcome you—just bring a sense of wonder, a splash of caution, and the promise of a day spent laughing beneath a canopy of crystal‑clear water.
